
Summary: This guide will go over how to create and utilize Group Policy Objects. To establish a baseline acceptable for a work environment, we will discuss how to implement particular boundaries in a controlled environment. This guide will also show you how to assign IP addresses by implementing a DHCP server as well as sending traffic through the domain controller with NAT. The purpose of this guide is go deeper into the roles that Active Directory provides.
(Note: Please go through my previous post “Active Directory Beginners Guide” before starting this one).
Table of contents:
Important Definitions
Group Policy Objects (GPOs)
-Accessing and Understanding GPOs
-Creating and Implementing Policies
Implementing DHCP and NAT
-Important Definitions
-Implementing DHCP
-Implementing NAT
Important definitions:
Group Policy Objects (GPOs): GPOs are simply a collection of settings that can be used to apply policies to objects. If you want to establish a baseline and limit access to specific computers and users, group policies are quite helpful. Restricting the Control Panel and Settings are one of the many examples.
Trees: A tree is a collection of multiple domains that are connected together with a single parent. For example, if you have a root parent Domain Controller (DC) named educate.com, you can have multiple child names. Each subdomain would have its own Active Directory, users, and computers. (ex. one.educate.com and two.educate.com.)
Forests: When a company acquires another company, the domain trees from both companies can be combined. This is called a forest.
Group Policy Objects (GPOs):
Accessing and Understanding GPOs
To access the GPOs, go to “Server Manager” > “Tools” > “Group Policy Management”. You can also find it through the Windows search bar.
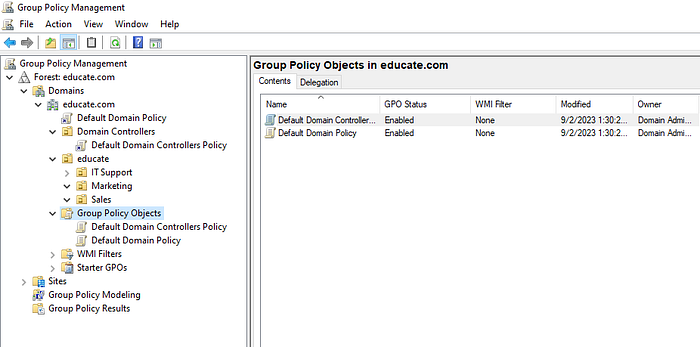
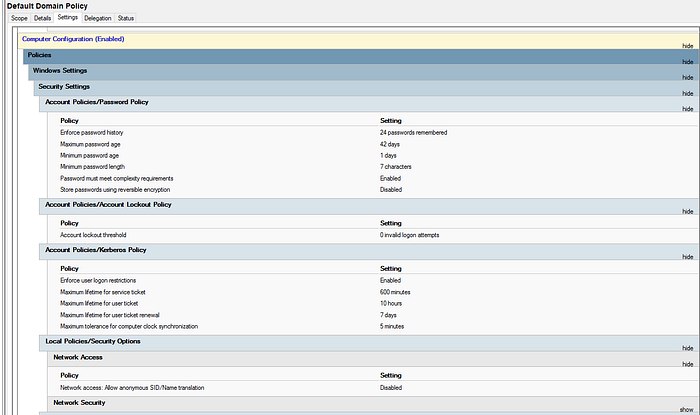
There are already two polices in the “Group Policy Objects” OU. If you double click on “Default Domain Policy”, in the “Scope” section, you can see where the policies have been applied. If you click on “Settings”, you can see general information about the policy. You can also view what the policy does.
You can see other options as well such as “Details”, “Status” and “Delegation” used to apply specific policy permissions/restrictions for users.
Creating and Implementing Policies
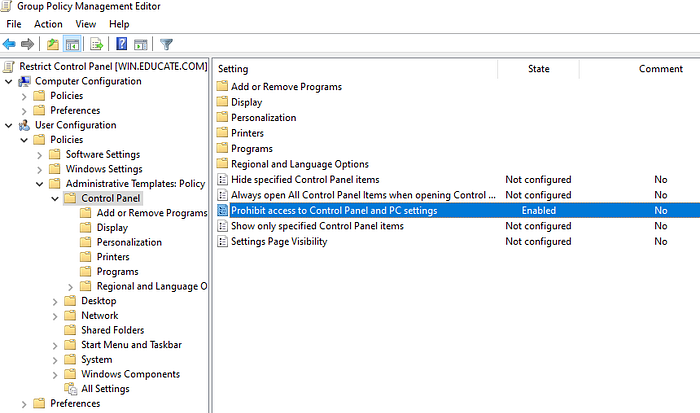
Lets create a new policy that restricts access to the control panel for the Marketing and Sales OUs.
Step 1: Right click on “Group Policy Objects” > click “New” > name it “Restrict Control Panel” > click “OK” > right click on your new policy and select “Edit” . This should open up the editor.
An important part of GPOs is the “Computer Configuration” and the “User Configuration”.
Computer Configuration: Policies that would affect the computer.
User Configuration: Policies that would affect the user.
Step 2: Click “User Configuration” > “Policies” > “Administrative Templates” > “Control Panel” > “Prohibit access to Control Panel and PC settings.”
Step 3: Right click the policy > “Edit” > select “Enabled” > “OK” > exit the editor.
Note: You can also read the help section to find out what the policy specifically does.
Step 4: Now in order to apply the policy, drag the policy into the wanted OU.
You can also right click on the desired OU and click “Link an Existing GPO”. From there, select the GPO we just created.
Note: If an OU has a computer and a user, it will only affect the user as we have selected it from the “User Configuration”.
It’s important to remember that the GPO will also apply to any sub-OUs under it. So for example, if you apply it to the the educate OU, it will apply to the IT support, marketing, and sales OU. As such, putting a GPO under the domain will apply to everything in that domain.

Great! Now all users under the marketing and sales OU cannot access Control Panel. Now log onto Hulk Smash to see if you can open Control Panel.
Note: If you can still open it, force the policy to update on the desired computer by typing:
gpupdate /force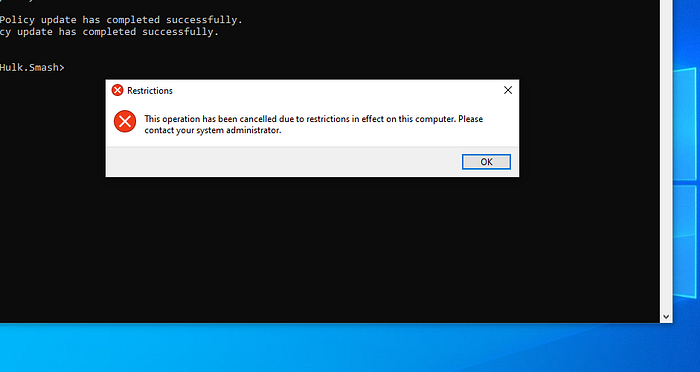
Implementing DHCP and NAT

Special thanks to Josh Madakor (https://www.youtube.com/c/JoshMadakor)
Important definitions
Dynamic Host Configuration Protocol (DHCP): In its most basic form, DHCP is a protocol that dynamically assigns IP addresses to hosts along with other information like the subnet mask, default gateway, and appropriate TCP/IP configuration.
Network Address Translation (NAT): Before sending information to the internet, NAT can be used to translated the private IP addresses in a local network to a public IP address. Businesses and homes that want a single public IP address use NAT. An advantage of NAT is that it hides your private IP addresses from the internet, making the internal structure hidden, preventing attackers from creating a map of the victim’s internal structure.
Implementing DHCP
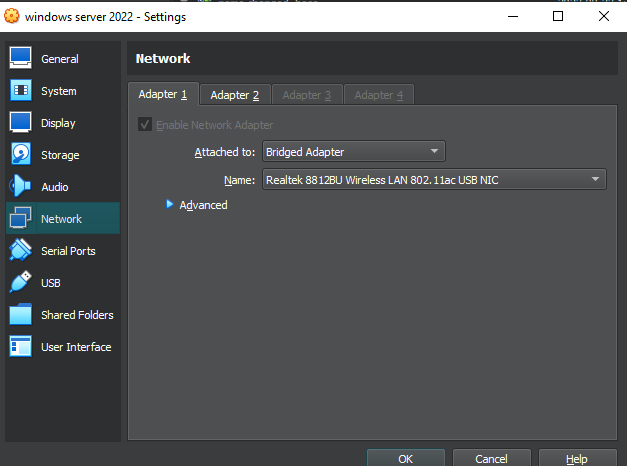
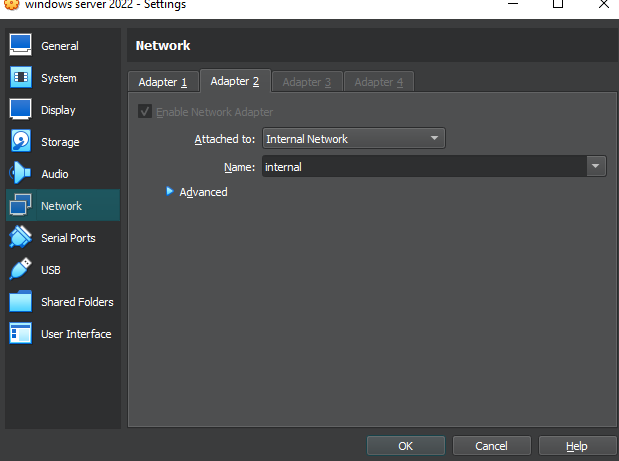
Step 1: Create another virtual computer named “DHCP” and another client named “Client”. Set your domain controller to a “bridged network” for adapter 1 and “internal network” for adapter 2. Set your client and DHCP computer to an “internal network”.
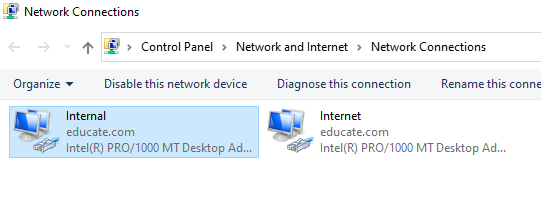
Step 2: Open up your DC > go to “Control Panel” > “Network and Internet” > “Network Connections”.
Step 3: Name the connection with an IP address as “Internet” and the other one as “Internal”. To find out which one has an IP address, right click on either network > select “Status” > “Details”.
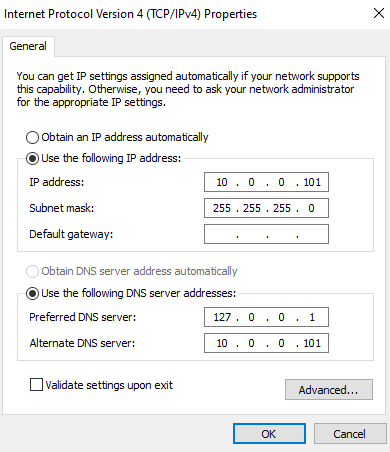
Step 4: Right click the “Internal” network > “Properties” > select “Internet Protocol Version 4”. Set it to like the image below.
Step 5: Open up your DHCP server machine and log in as admin > go to “Control Panel” > “Network and Internet” > “Network Connections”.
Step 6: Right click the “Internal” network > “Properties” > “Internet Protocol Version 4”. Set it to like the image below.
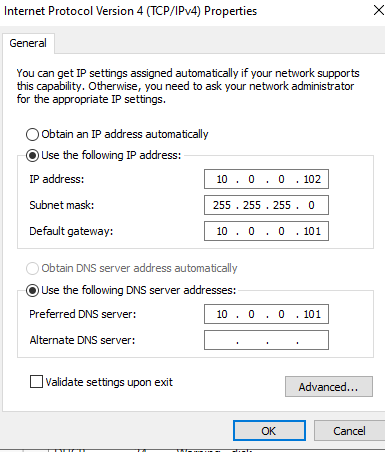
We will be using the DC as the default gateway.
Step 7: Now connect it to the domain — Go to “About Your PC” > “Advanced System Settings” > “Computer Name” > “Change” > Connect it to educate.com (or whatever you’ve named your domain).

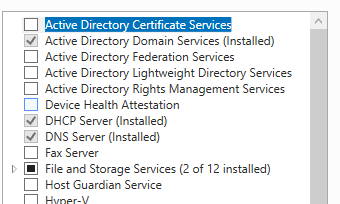
Step 8: Add DHCP to the domain — Go to “Server Manager” > “Manage” > “Add roles and features” > select the server > checkbox “DHCP” > complete the installation.
Step 9: Click on the flag at the top of Server Manager and click “Complete DHCP configuration” > click “Next” the whole way through and complete the installation.

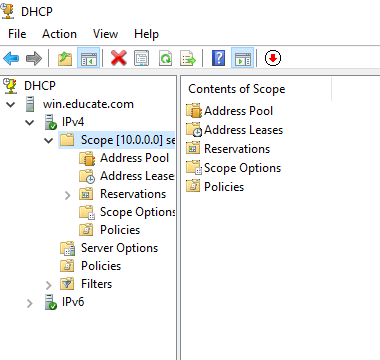
Step 10: Go to “Tools > “DHCP”. We will now want to create a new scope. Right click “IPv4” > select “New Scope”.
Step 11: Name your scope anything > “Next” > set your range from 10.0.0.200–10.0.0.250. Put the length as a 24 bit mask. > “Next”x3 > in the IP section, type in “10.0.0.101” > Click “Add” > skip everything else and finish up the installation.
Step 12: Go onto your client computer > open up Command Prompt > type in “ipconfig”. You should see that the IP is within the scope and the default gateway is 10.0.0.101.

Implementing NAT
Step 1: Now we want it to be able to connect to the internet. Go to your DC > “Server Manager” > “Manage” > “Add roles and features” > select the server > checkbox “Remote Access” > “Next”x2 > checkbox “Routing” > complete the installation.
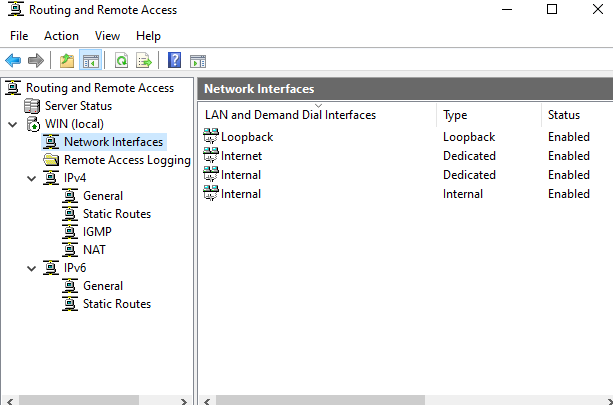
Step 2: Now go to “Tools” > “Routing and remote access” > left click your local computer > “Configure and Enable Routing and Remote Access”.
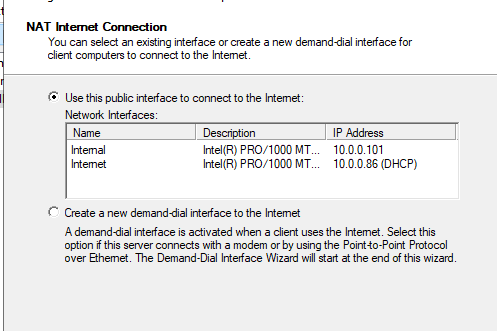
Step 3: Select “Network Address Translation (NAT)” > click the “Internet” network > Finish up the installation.
Congratulations, your client now has access to the internet!
Thank you for reading. Hope it helps.